Creating a digital photo frame with color e-ink
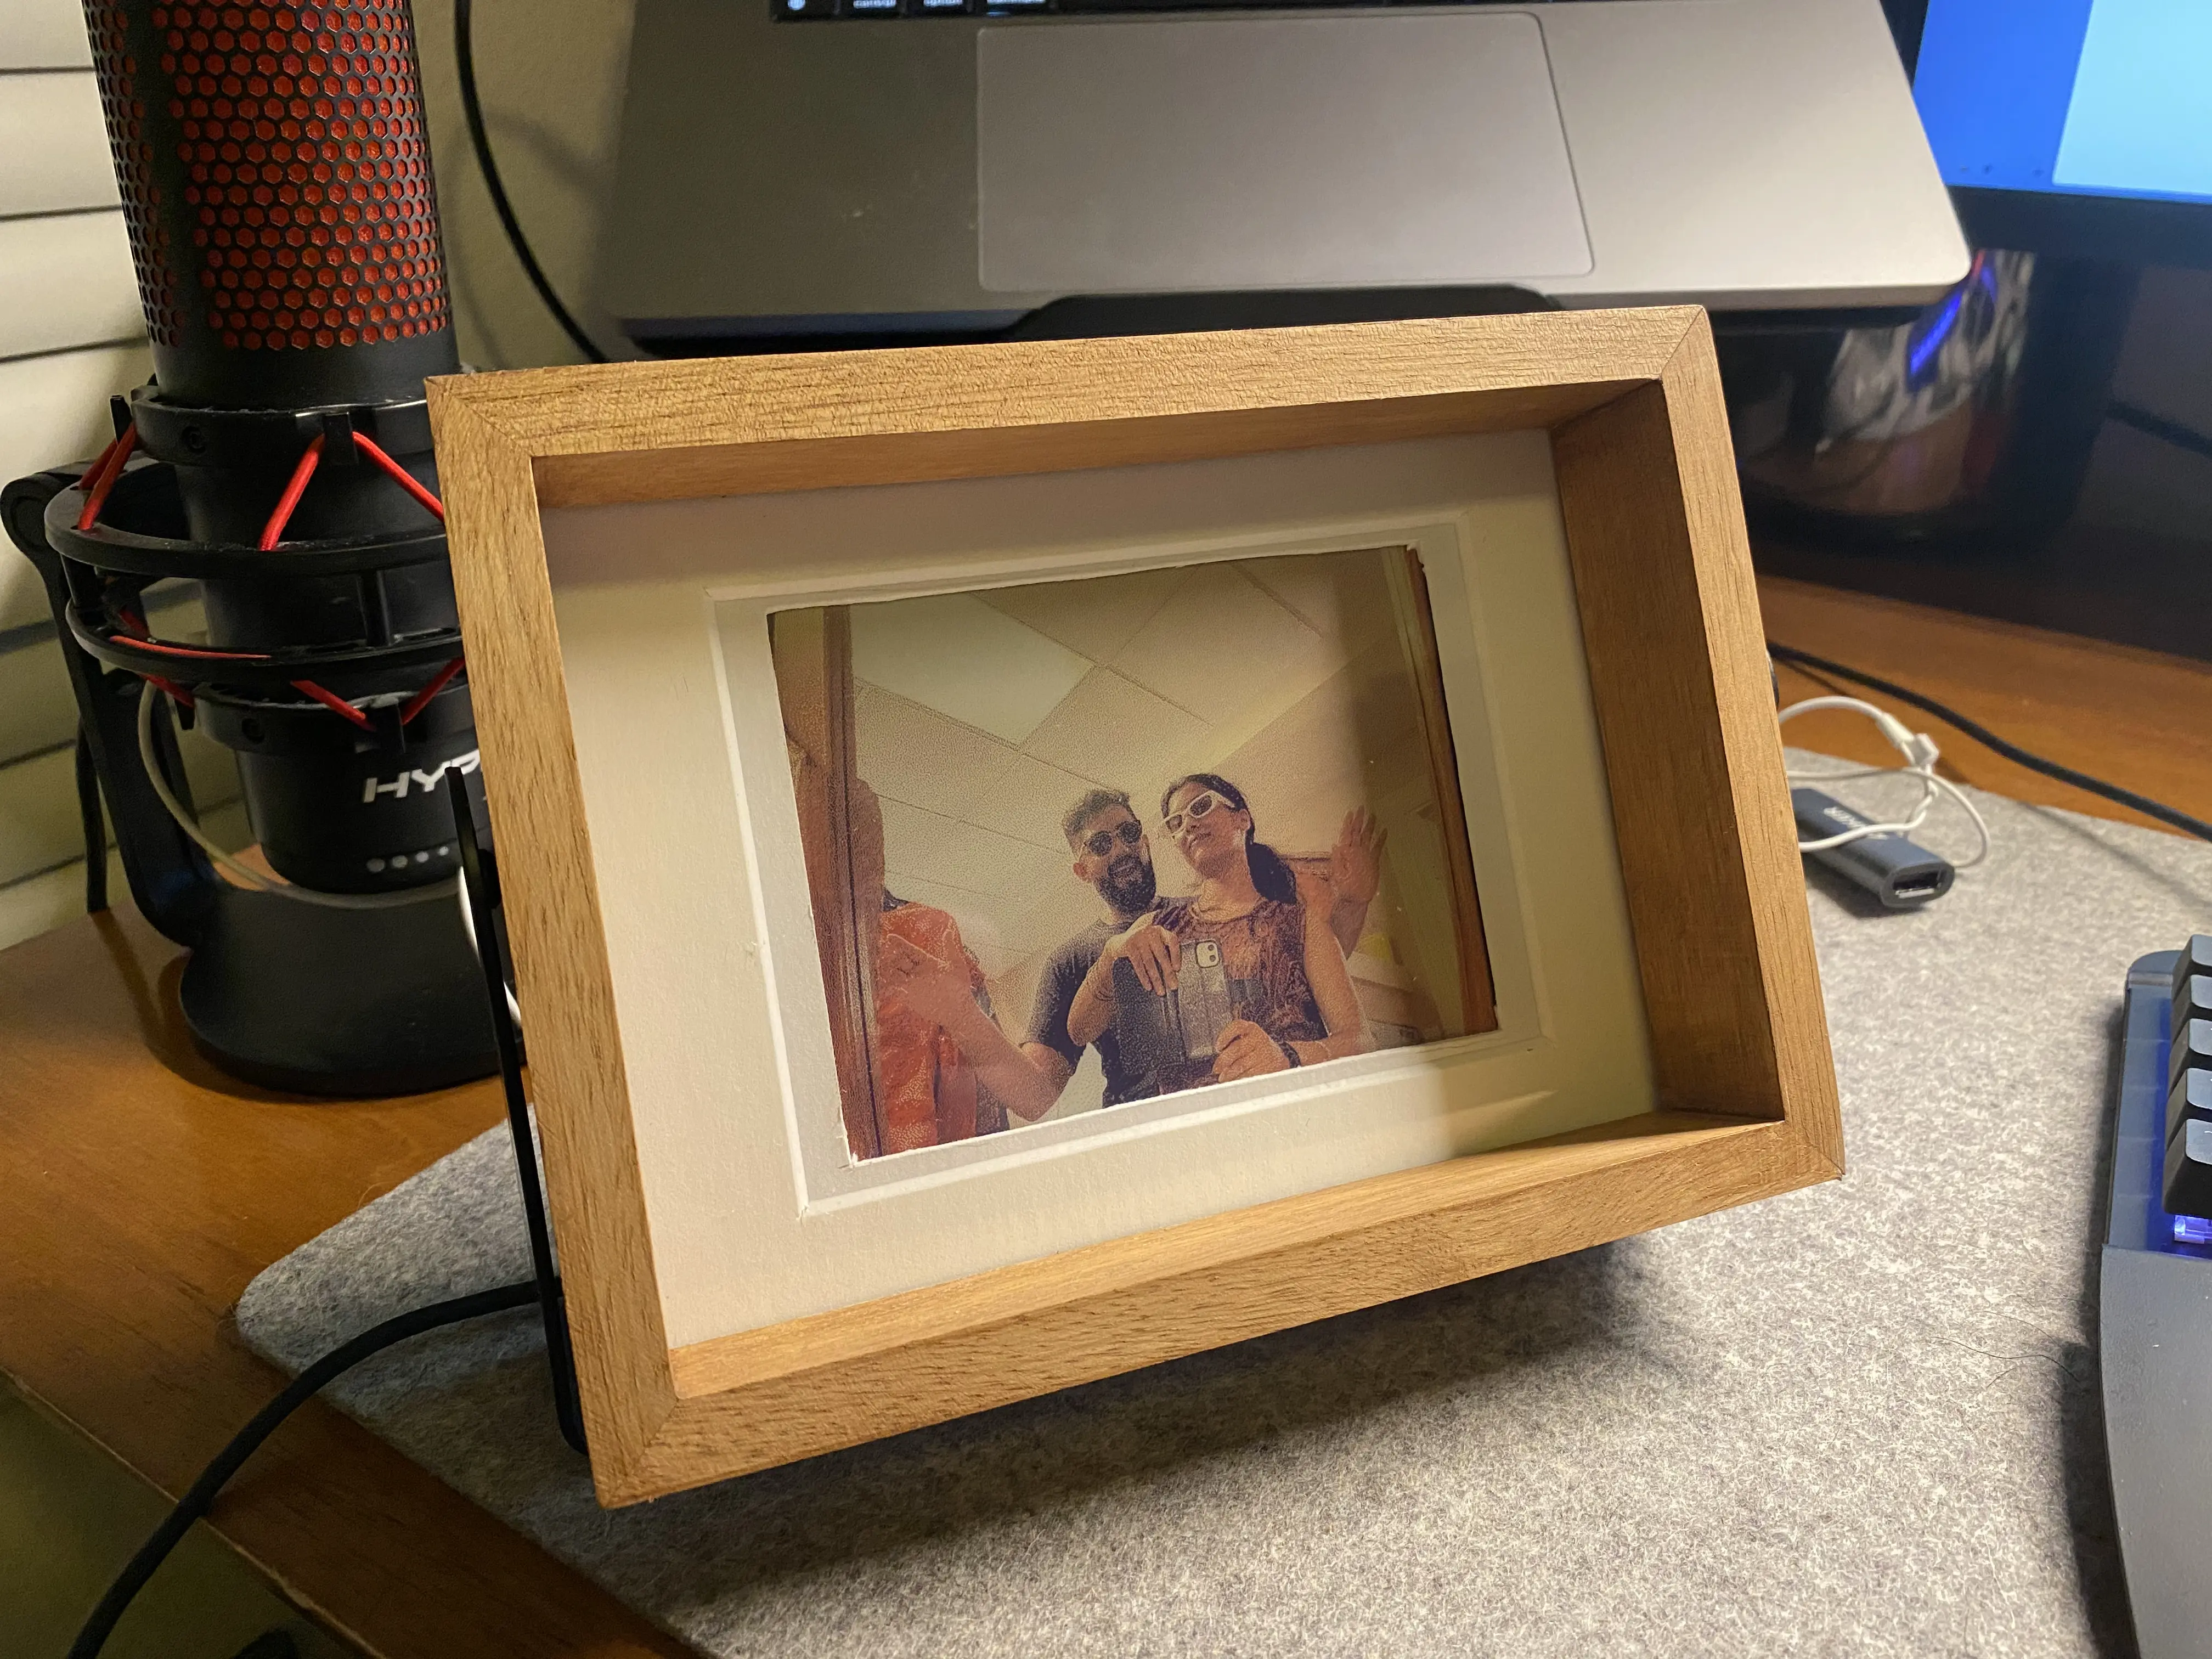
6 May, 2025 | 4 min readFor valentines day this year I wanted to make a unique gift, something that I couldn't just buy off the shelf for my partner. We've taken dozens of photos over the years and I wanted my partner to have a nice way to view all of the photos. I immediately thought of a digital photo frame but the problem with the off the shelf ones is that they use backlit screens. Meaning that no matter how much you try, it still looks like a screen at the end of the day. The backlit screen could also be distracting in a dark or dimly lit room, that definitely would not get my partners approval.
Somehow the Youtube algorithm knew I was thinking about this project and it suggested this video by AKZ Dev that shows how to build a color E-Ink clock in a photo frame form factor. Seeing color E-Ink used in this form factor gave me an idea, why not use a color E-Ink to build a digital photo frame. You get all the benefits of a screen, where you can change what is displayed, without the cons of a backlit screen. Since a digital photo frame does not display moving content, this seemed to be the solution I was looking for.
I began by digging into the repo linked in the AKZ Dev video, InkyPi. The developer behind it, Fatih, has created a great project which allows you to easily create plugins for the InkyPi! So it began, I dusted off my Python knowledge and began working on developing my photo frame plugin. It actually was very easy to create the plugin after reading some of the docs and code in the project. The developer experience was a little rough as every change required me to scp my changes to my Raspberry Pi and rebuild on it. But after a few iterations I landed on the following Python class:
from plugins.base_plugin.base_plugin import BasePlugin
from PIL import Image
from utils.app_utils import resolve_path
from pathlib import Path
import logging
import os
from utils.watch_buttons import Worker
from utils.image_utils import resize_image, change_orientation

logger = logging.getLogger(__name__)

class PhotoAlbum(BasePlugin):

    def __init__(self, config):
      super().__init__(config)  # Call the base class constructor
      self.device_config = None
      self.current_Image_Index = 0
      self.buttonWatcher = Worker(self.increment, self.decrement)  # Now created inside __init__
      self.inky_display = None

    def generate_image(self, settings, device_config, inky_display):

        # Open the image using Pillow
        try:
          self.device_config = device_config
          if inky_display is not None:
            self.inky_display = inky_display
          all_images = os.listdir(os.path.join(Path(resolve_path("static")), "images", "saved"))
          image_location = os.path.join(Path(resolve_path("static")), "images", "saved", all_images[self.current_Image_Index])
          image = Image.open(image_location)
        except Exception as e:
          print("Error reading file");
          logger.error(f"Failed to read image file: {str(e)}")
          raise RuntimeError("Failed to read image file.")

        self.current_Image_Index += 1

        if self.current_Image_Index < (len(all_images) - 1):
          print("Index is within range")
        else:
          self.current_Image_Index = 0

        return image

    def increment(self):
      if self.inky_display is not None:
        try:
          print("Increment index:")
          print(self.current_Image_Index)
          all_images = os.listdir(os.path.join(Path(resolve_path("static")), "images", "saved"))
          image_location = os.path.join(Path(resolve_path("static")), "images", "saved", all_images[self.current_Image_Index])
          image = Image.open(image_location)

          # Resize and adjust orientation
          image = change_orientation(image, "horizontal")
          image = resize_image(image, self.device_config.get_resolution(), [])

          self.current_Image_Index += 1
          if self.current_Image_Index < (len(all_images) - 1):
            print("Index is within range")
          else:
            self.current_Image_Index = 0

          self.inky_display.set_image(image)
          self.inky_display.show()
        except Exception as e:
          logger.error(f"Failed to read image file: {str(e)}")
          raise RuntimeError("Failed to read image file.")

    def decrement(self):
      if self.inky_display is not None:
        try:
          print("Decrement index:")
          print(self.current_Image_Index)
          self.current_Image_Index -= 2

          all_images = os.listdir(os.path.join(Path(resolve_path("static")), "images", "saved"))
          image_location = os.path.join(Path(resolve_path("static")), "images", "saved", all_images[self.current_Image_Index])
          image = Image.open(image_location)

          # Resize and adjust orientation
          image = change_orientation(image, "horizontal")
          image = resize_image(image, self.device_config.get_resolution(), [])

          self.current_Image_Index += 1
          if self.current_Image_Index < (len(all_images) - 1):
            print("Index is within range")
          else:
            self.current_Image_Index = 0

          self.inky_display.set_image(image)
          self.inky_display.show()
        except Exception as e:
          logger.error(f"Failed to read image file: {str(e)}")
          raise RuntimeError("Failed to read image file.")
The color E-Ink display I used was a kit specifically made for the Raspberry Pi which has 4 buttons on the back of the display. I really wanted those buttons to serve a function with this photo frame plugin and as such I had to add support to the project for reading button events. With my plugin you can move to either the next or previous image by clicking 2 of the buttons located at the rear of the display.
All of my code for this plugin has been committed to a fork of the original InkyPi repo. So feel free to play around with it and extend my plugin!
Project Bill of Materials (BOM)
- Raspberry Pi 2 Zero W - $14.99
- Pimoroni 5.7" Inky Impression colour E-Ink display - $66.17
- Natural wood photo frame - $14.99
Total: $96.15
Wrapping things up
This was such a fun project to work on! It was great working on a physical project and making something for a gift instead of purchasing one for valentines day. Huge shout out to Fatih for creating the InkyPi project!